AWS Setup
Introduction
Here we will show you how to integrate your React Native project with a back-end using AWS Amplify.
What is included in your AWS Amplify Project:
- User authentication (AWS Cognito).
- GraphQL API (AppSync)
- Lambda function and Lambda Trigger function
- Storage using Amazon S3.
Setup
To get started with AWS Amplify in your React Native project, you'll need to install and configure the Amplify CLI by clicking here to find out exactly how to do that.
Configuration:
Initialise the AWS Amplify project
From command line at the root of your project run:
amplify init
You will be asked:
- Enter a name for the environment (dev)
- Choose your default editor
- Select the authentication method you want to use with two options: AWS profile , AWS access keys.
- Select AWS profile and select the profile you will like to use.
This is what it would look like:
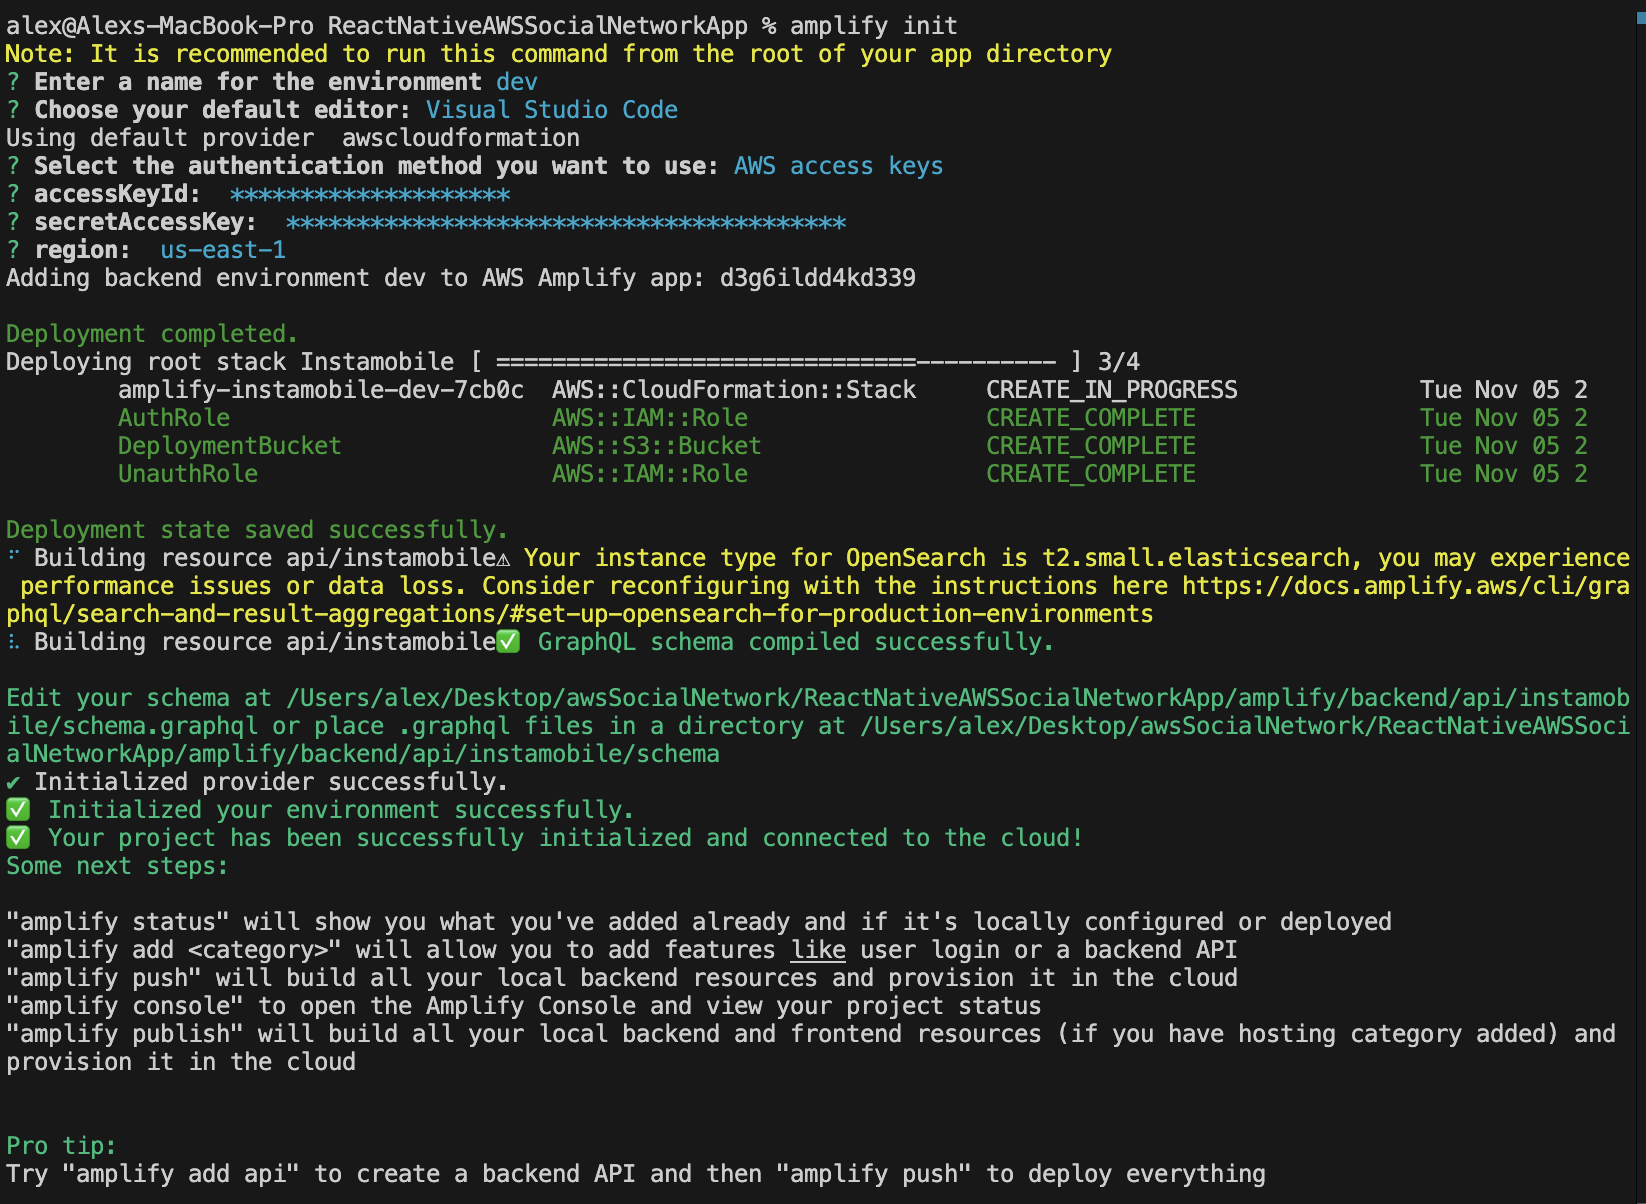
After doing this, you will be done with initialising ur project.
To see your resources available to push, run:
amplify status
run the command bellow to push auth
amplify push auth
run the command bellow to push api
amplify push api
This is what it would look like:

Now to push the functions, you need to:
- Configure a new server app client for your function
- Add environment variables for your functions.
- Register a user in your react native app to access app client in your functions
- Delete created account in dynamoDB
Configure a server app client for your function
- Log in to your AWS Amplify account.
- Click on the search input, and enter Cognito. Click on Cognito under Services.
- Copy the User pool ID and paste it somewhere (you will need it later).
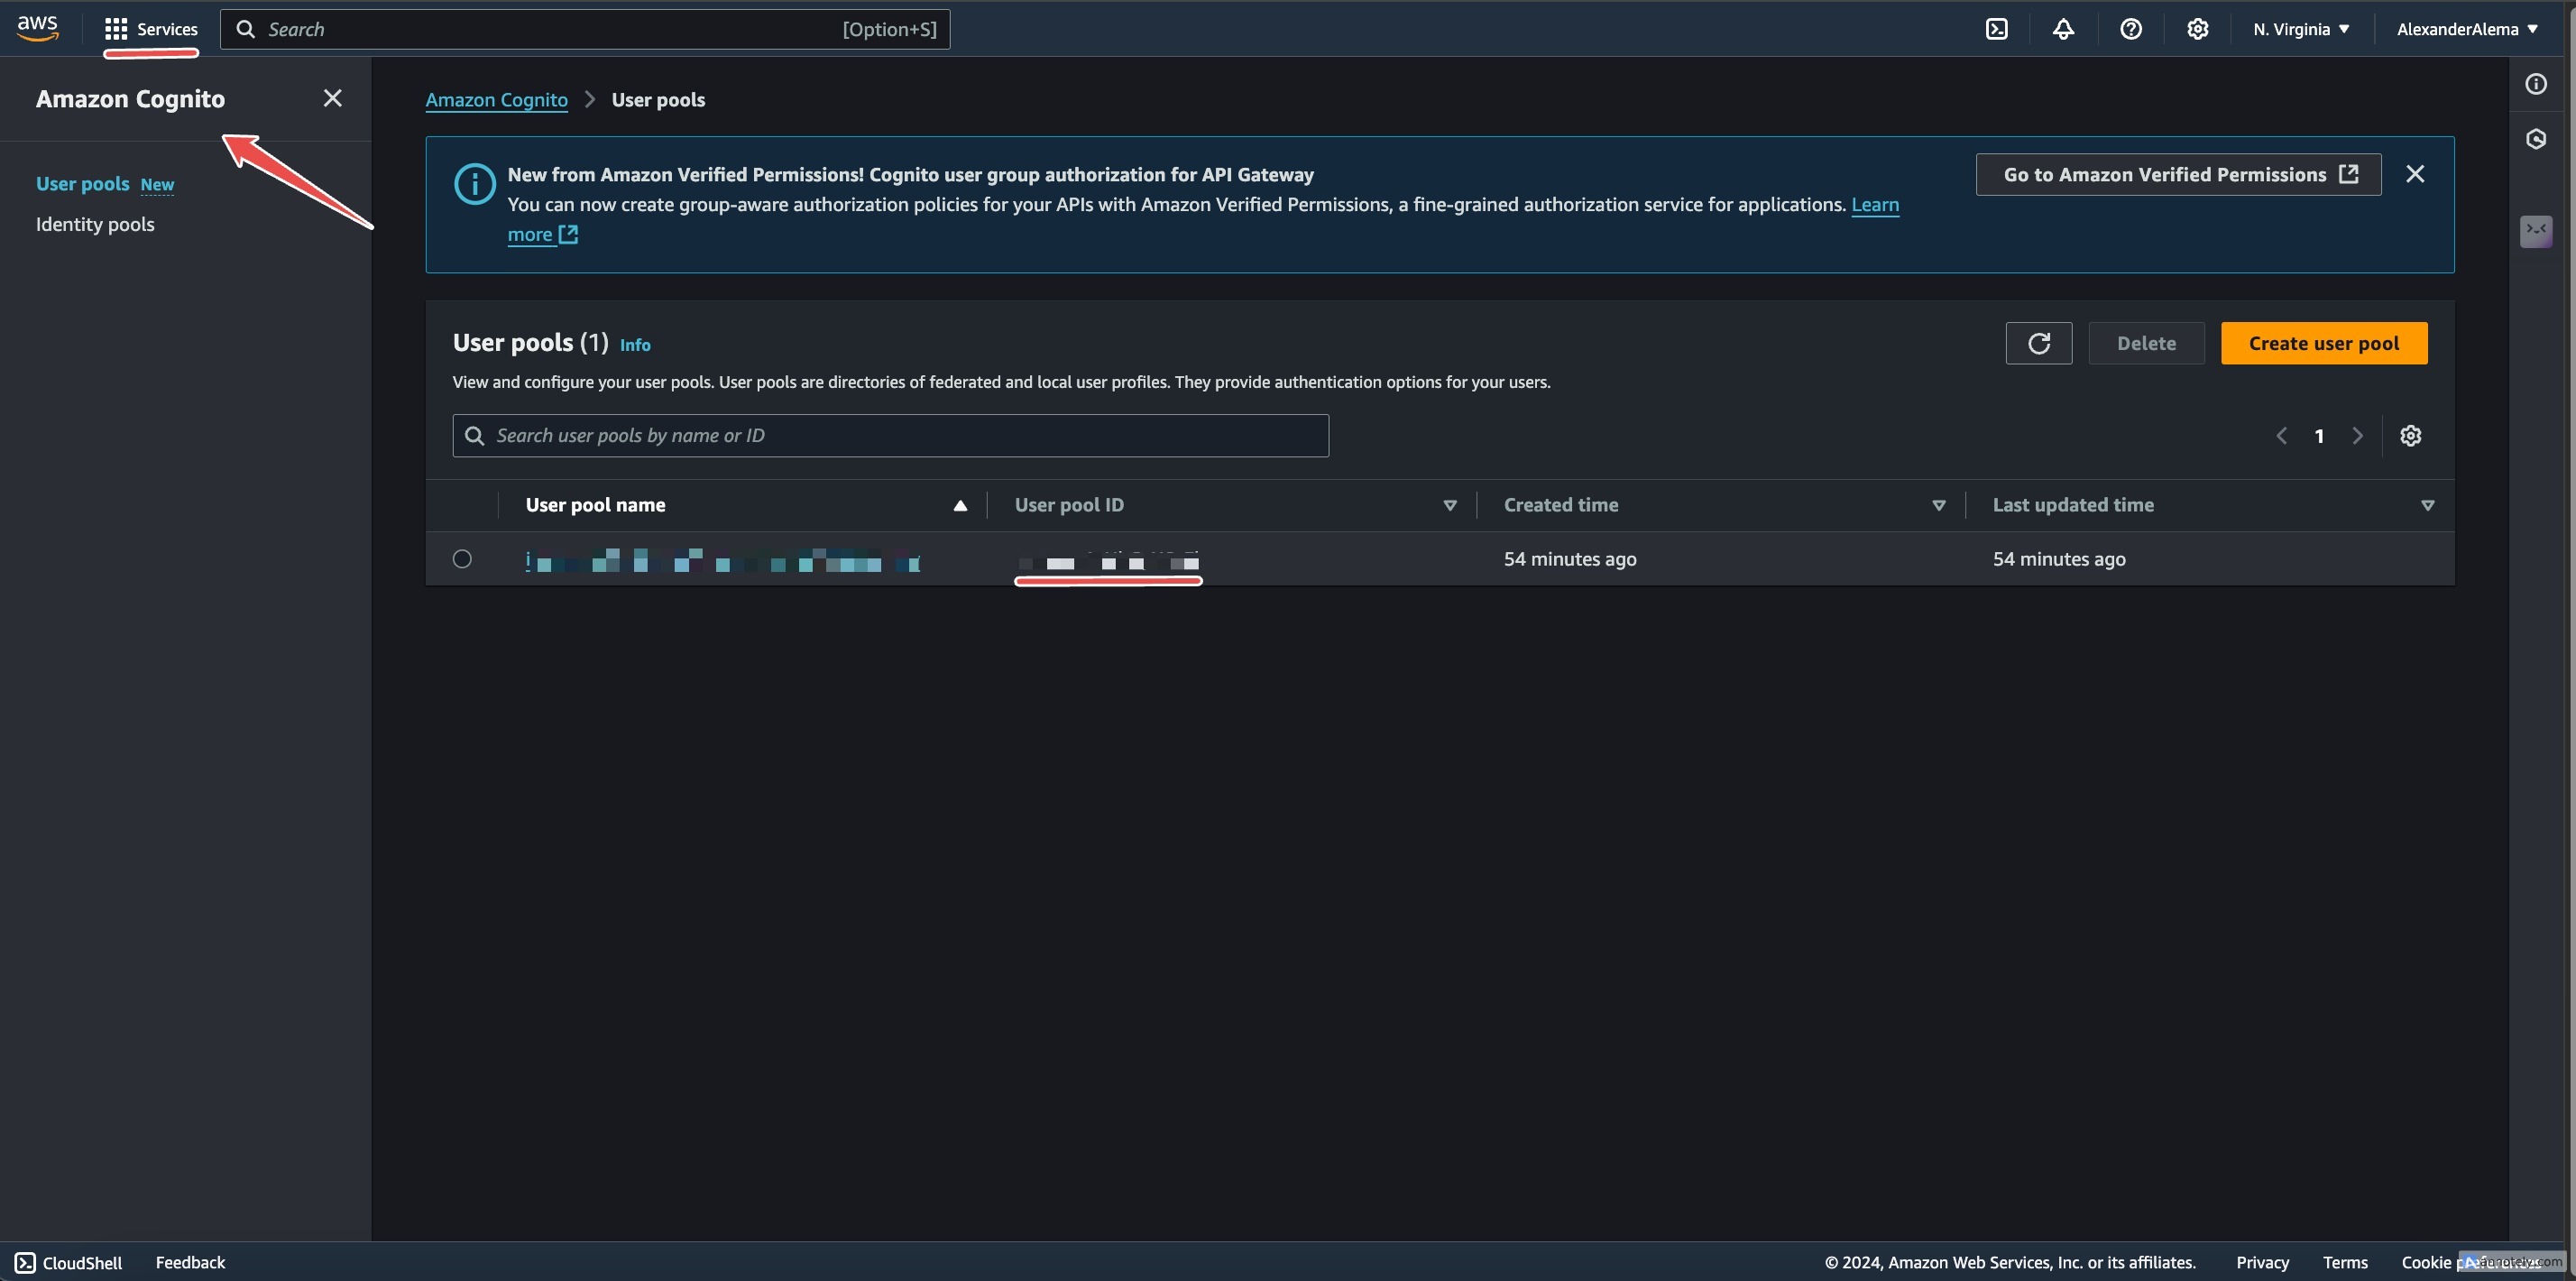
- After copying the pool id, click on the App clients section.
- Click on Add another app client.
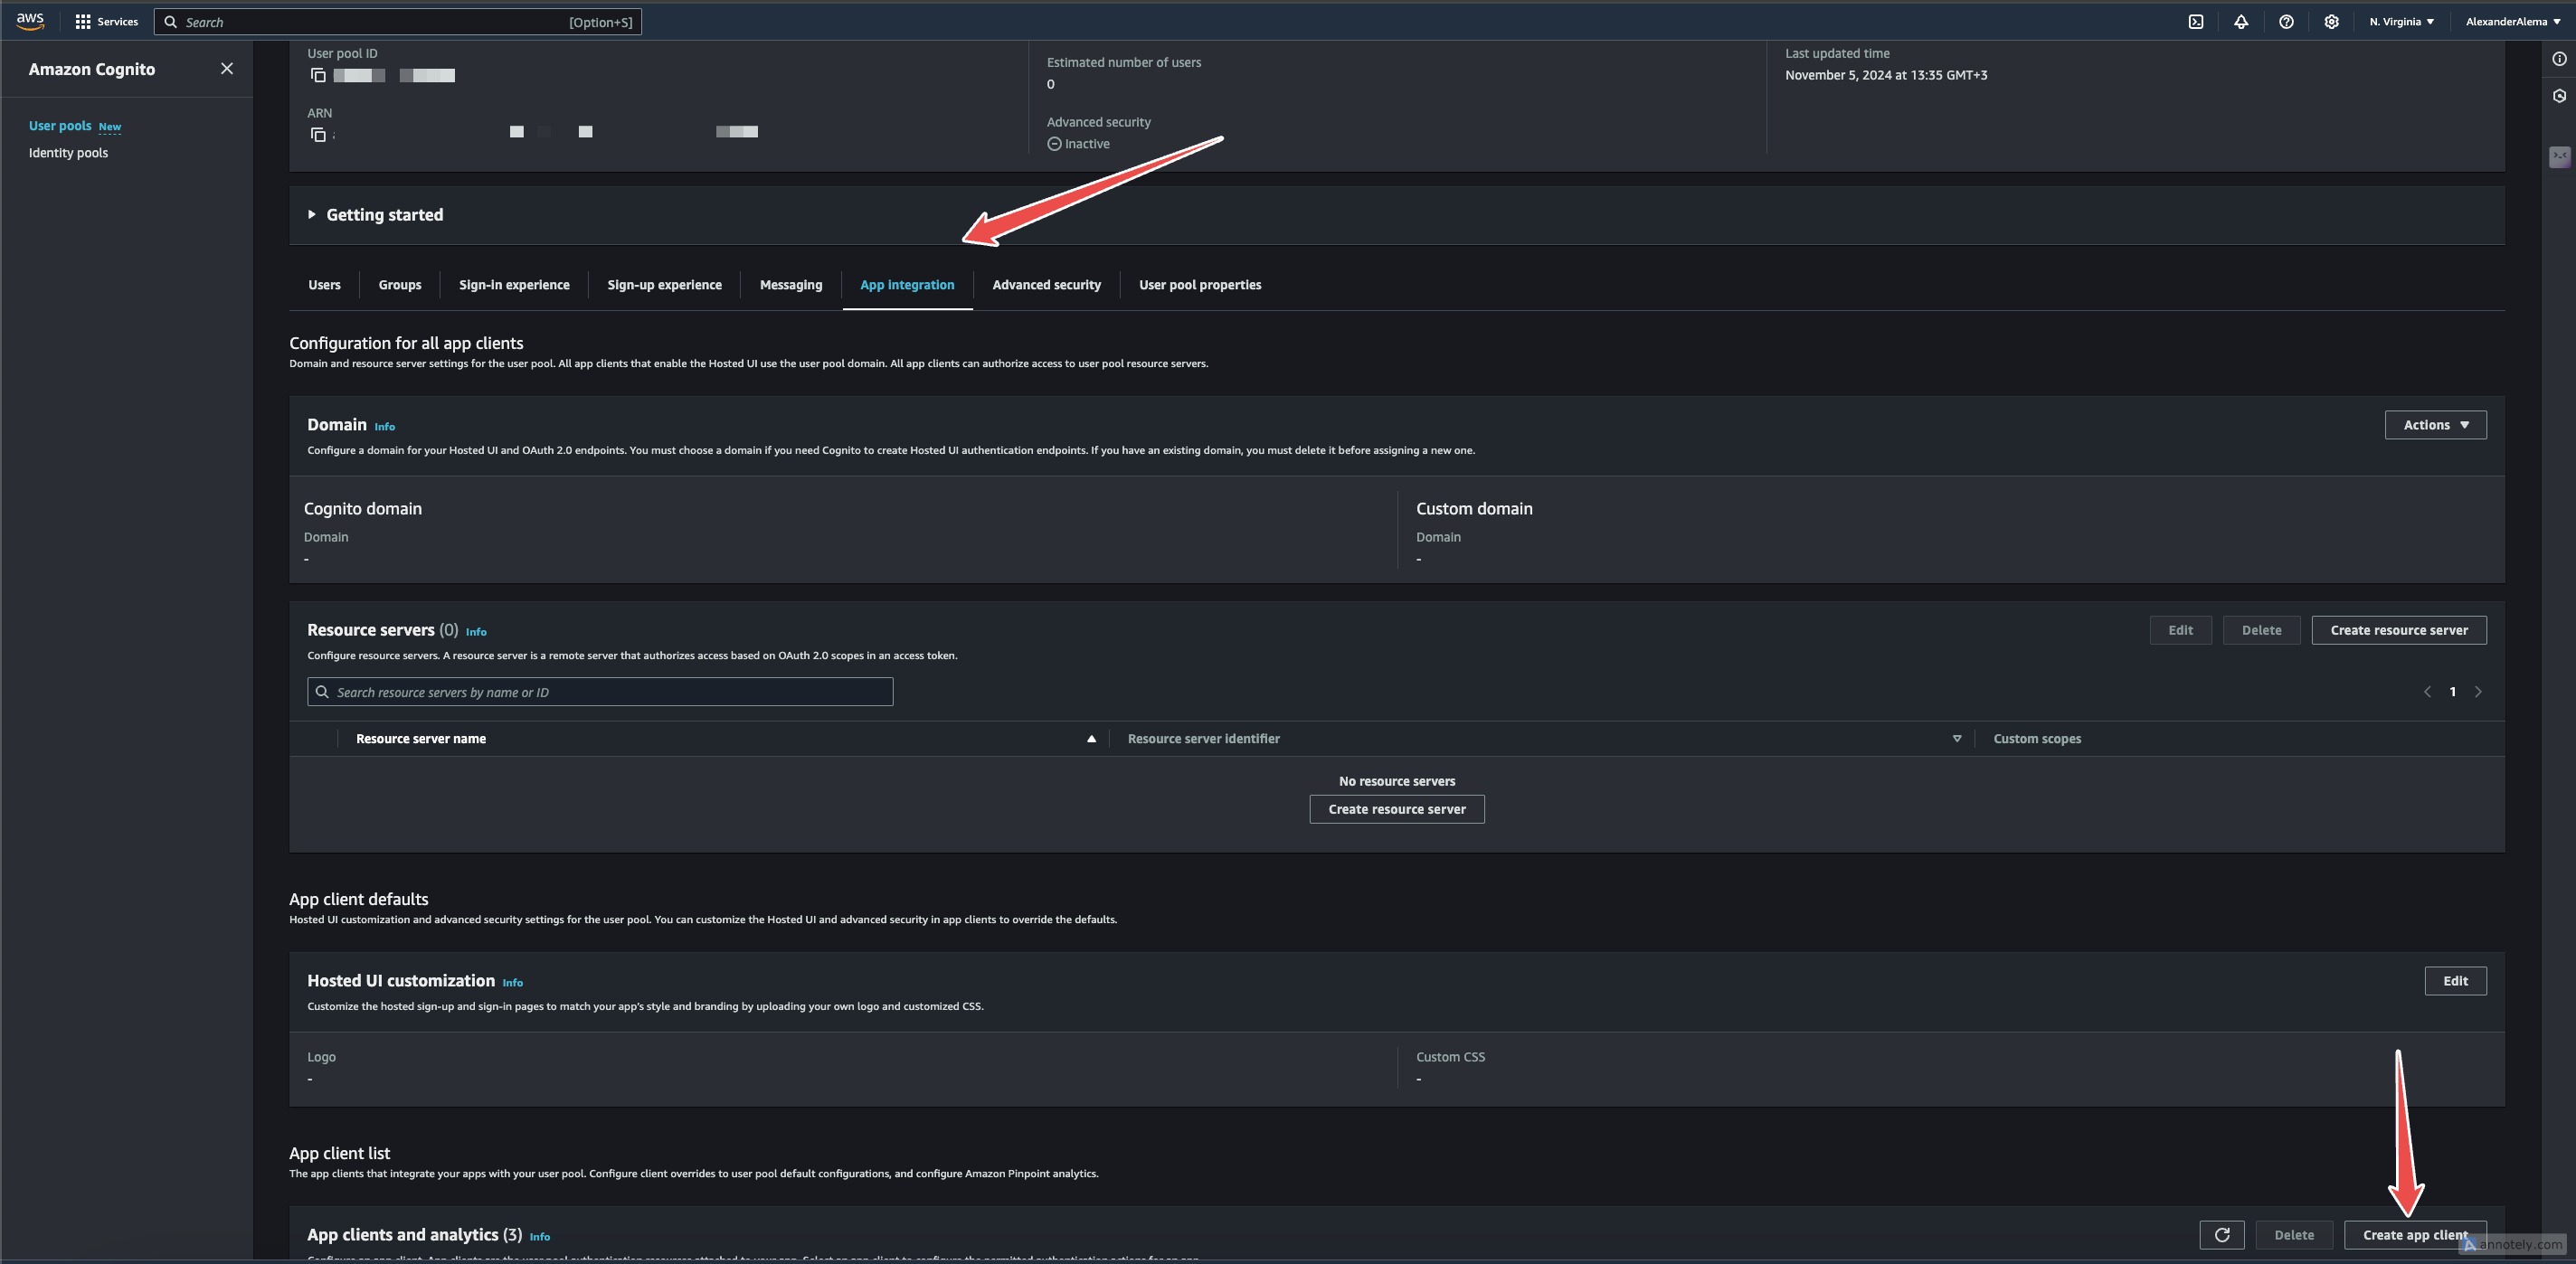
- Give it any name you want.
- Set your Auth Flows Configuration like in the image below:
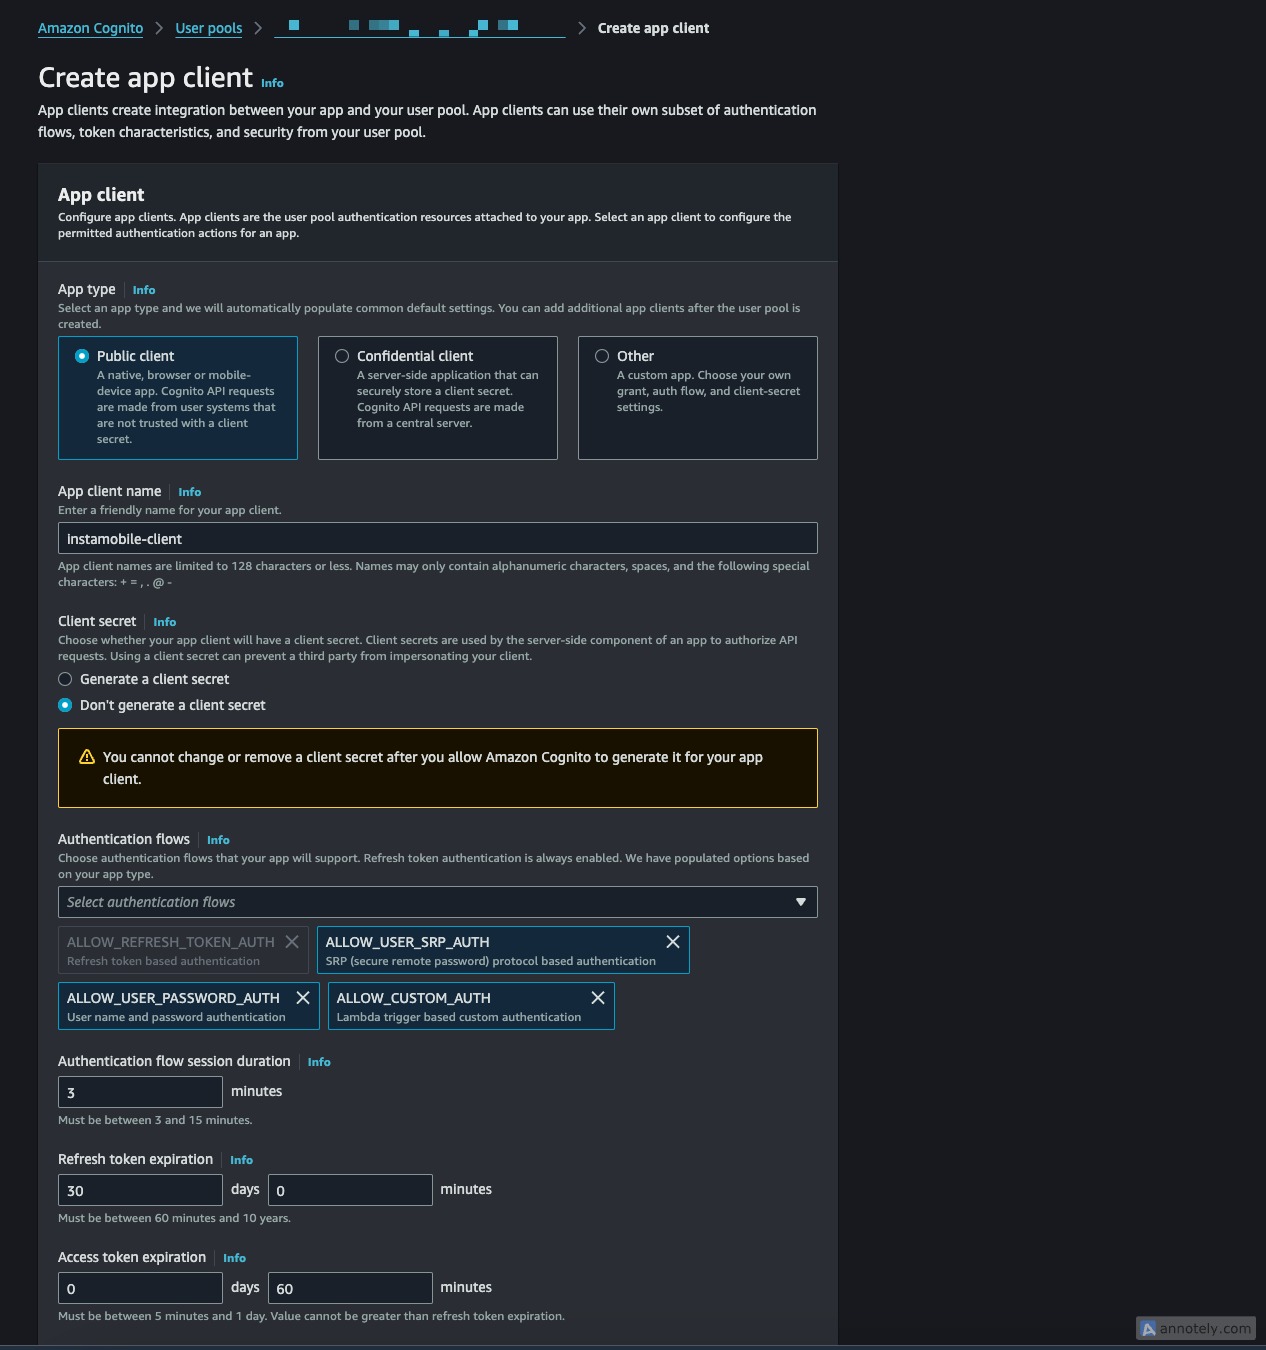
- After saving, you will have your App client id. Copy it and paste it somewhere.
Now you have the Pool id (Cognito user pool id) and App client id saved.
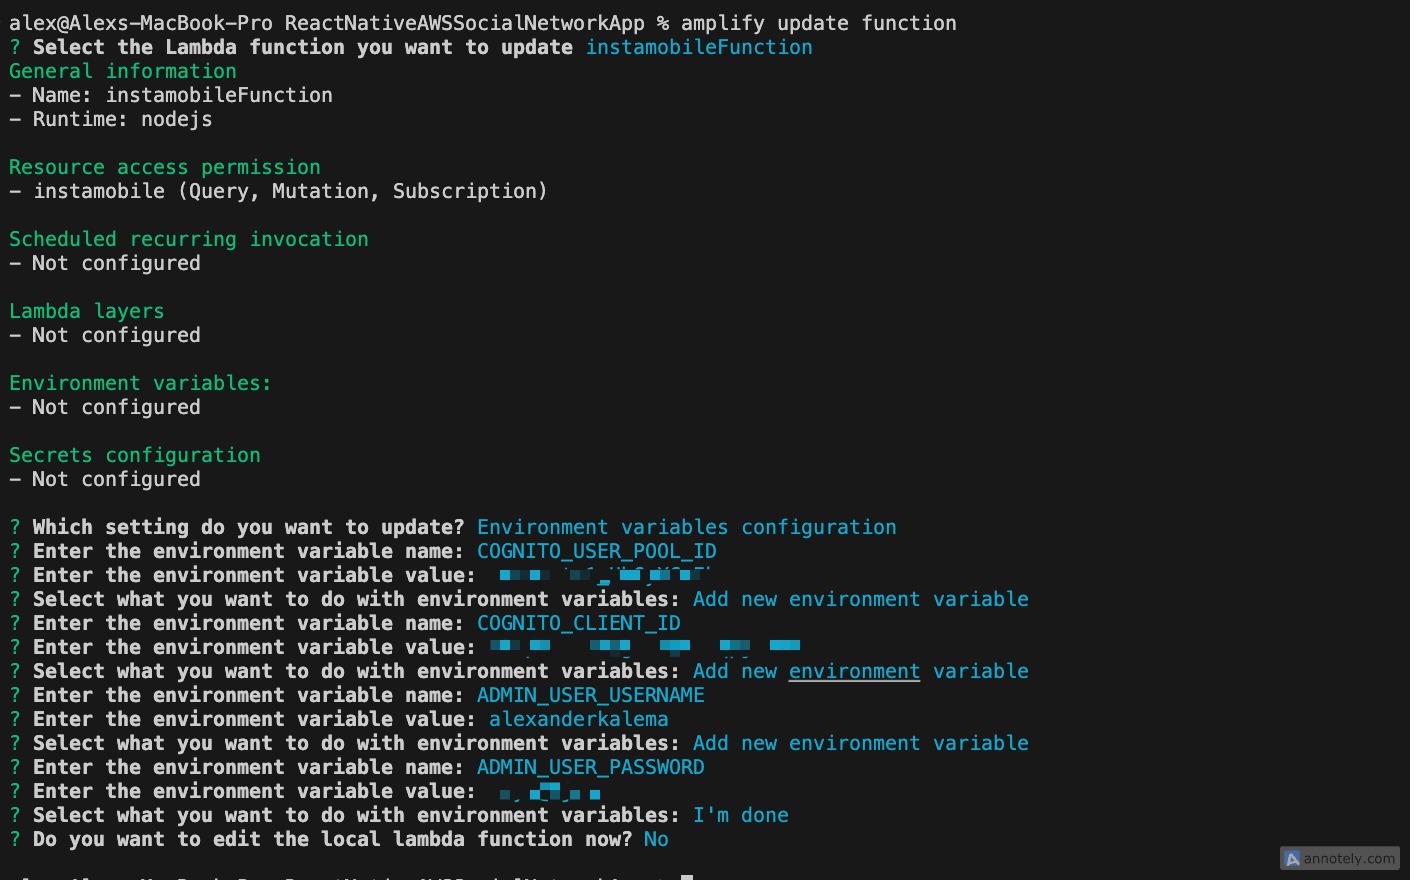
Add environment variables for your functions
You will need to update the environment variables for the two Lambda functions. To do this, run the command:
amplify update function
Select any of the functions, then select Environment variables configuration. Configure each environment variable with the names and values as written above.
- COGNITO_CLIENT_ID:
<app-client-id> - COGNITO_USER_POOL_ID:
<pool-id> - ADMIN_USER_USERNAME:
<chosen-username> - ADMIN_USER_PASSWORD:
<chosen-password>(password must be a minimum of 8 characters with numbers)
The process should look like:
Also navigate to the src directory in the two functions and run
cd amplify/backend/function/instamobileFunction/src
npm install
Repeat the process for the second function.
Remember you need to repeat this process for the second function (instamobileTrigger). And this is all. you can now push your functions by running the command:
amplify push function
Register a user in your react native app to access app client in your functions
You need to do this in order to give your functions access to app sync using access token from ur created app client. Now go to your react native app and register a new user with your chosen username(email) and chosen password you added as environment variables
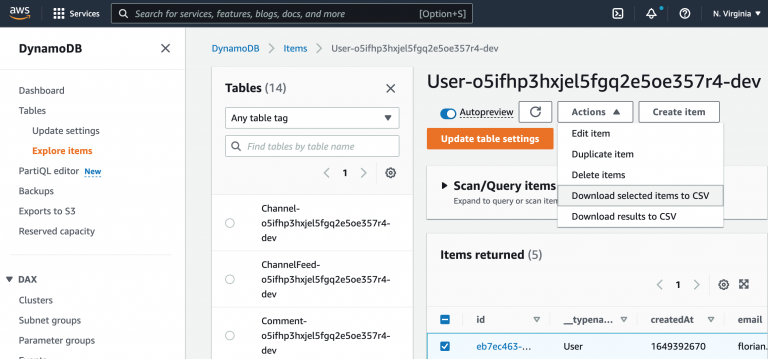
Delete created account from dynamoDB
Now search for dynamoDb in the search input on your account on the web
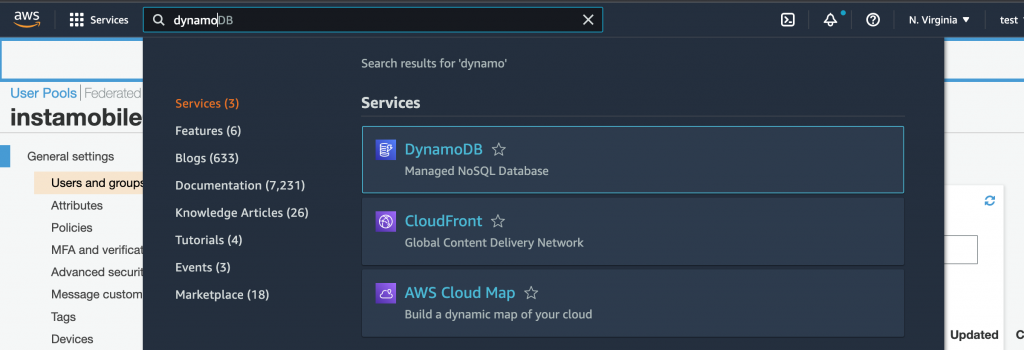
– Click on DynamoDB under services – Select Tables section at the left, then explore items – Select user and delete the newly created user from ur dynamoDb so it is not accessible to other users.
Your app is ready to use.
Your Amplify CLI is now configured and ready to use. You can start building your AWS-powered applications with full access to AWS services through Amplify.
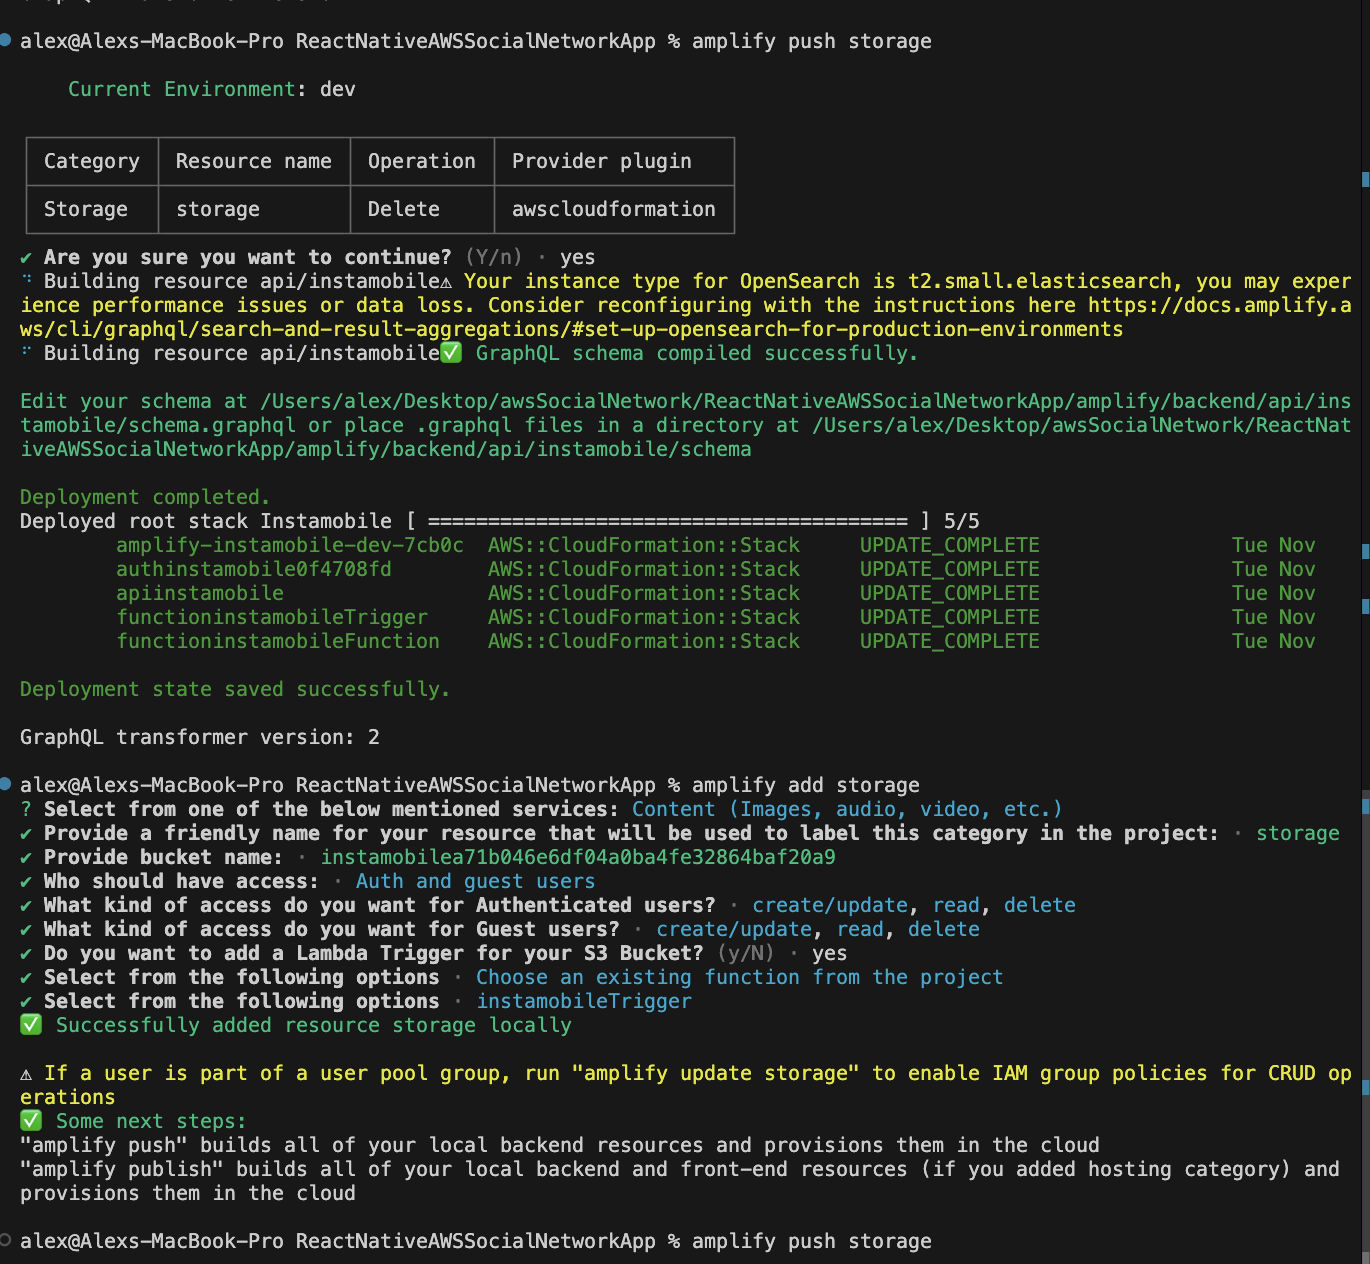
If you're facing problems with your storage. You can remove and add it again by running commands.
amplify remove storage
amplify push storage
amplify add storage
amplify push storage