Getting Started with React & Node.js
This guide provides step-by-step instructions for setting up our Admin panels on your machine. These panels are designed to simplify the management of the applications created by our team. First, you will need to install Node.js. Follow this Official Guide to start with Node.js that includes npm, a package manager that helps install everything else we need.
1. Preparing Your Project
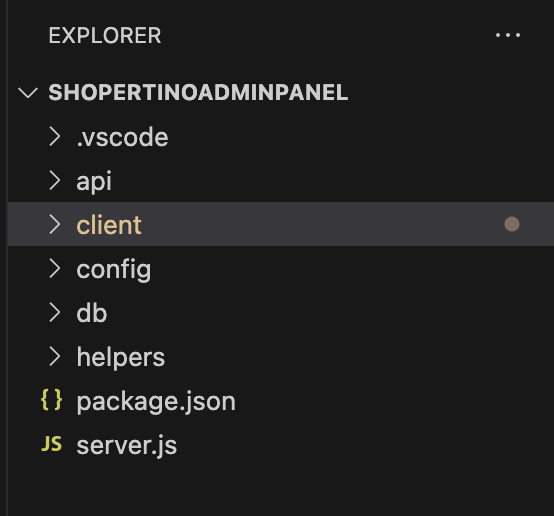
Once Node.js is installed, open your terminal and navigate to the admin panel folder. Your project structure should look like
Run the following command to set up the project dependencies:
yarn install
cd client
yarn install
cd ..
This will install all required packages.
2. Configuring Your Admin Panel
- Server Configuration
- Client Configuration
Before running the project, you need to set up your Firebase configuration:
- Create a Firebase project at Firebase Console - If you haven't set it up already.
- Download your service account key (JSON file) from Firebase Console:
- Go to Project Settings > Service Accounts
- Click "Generate New Private Key"
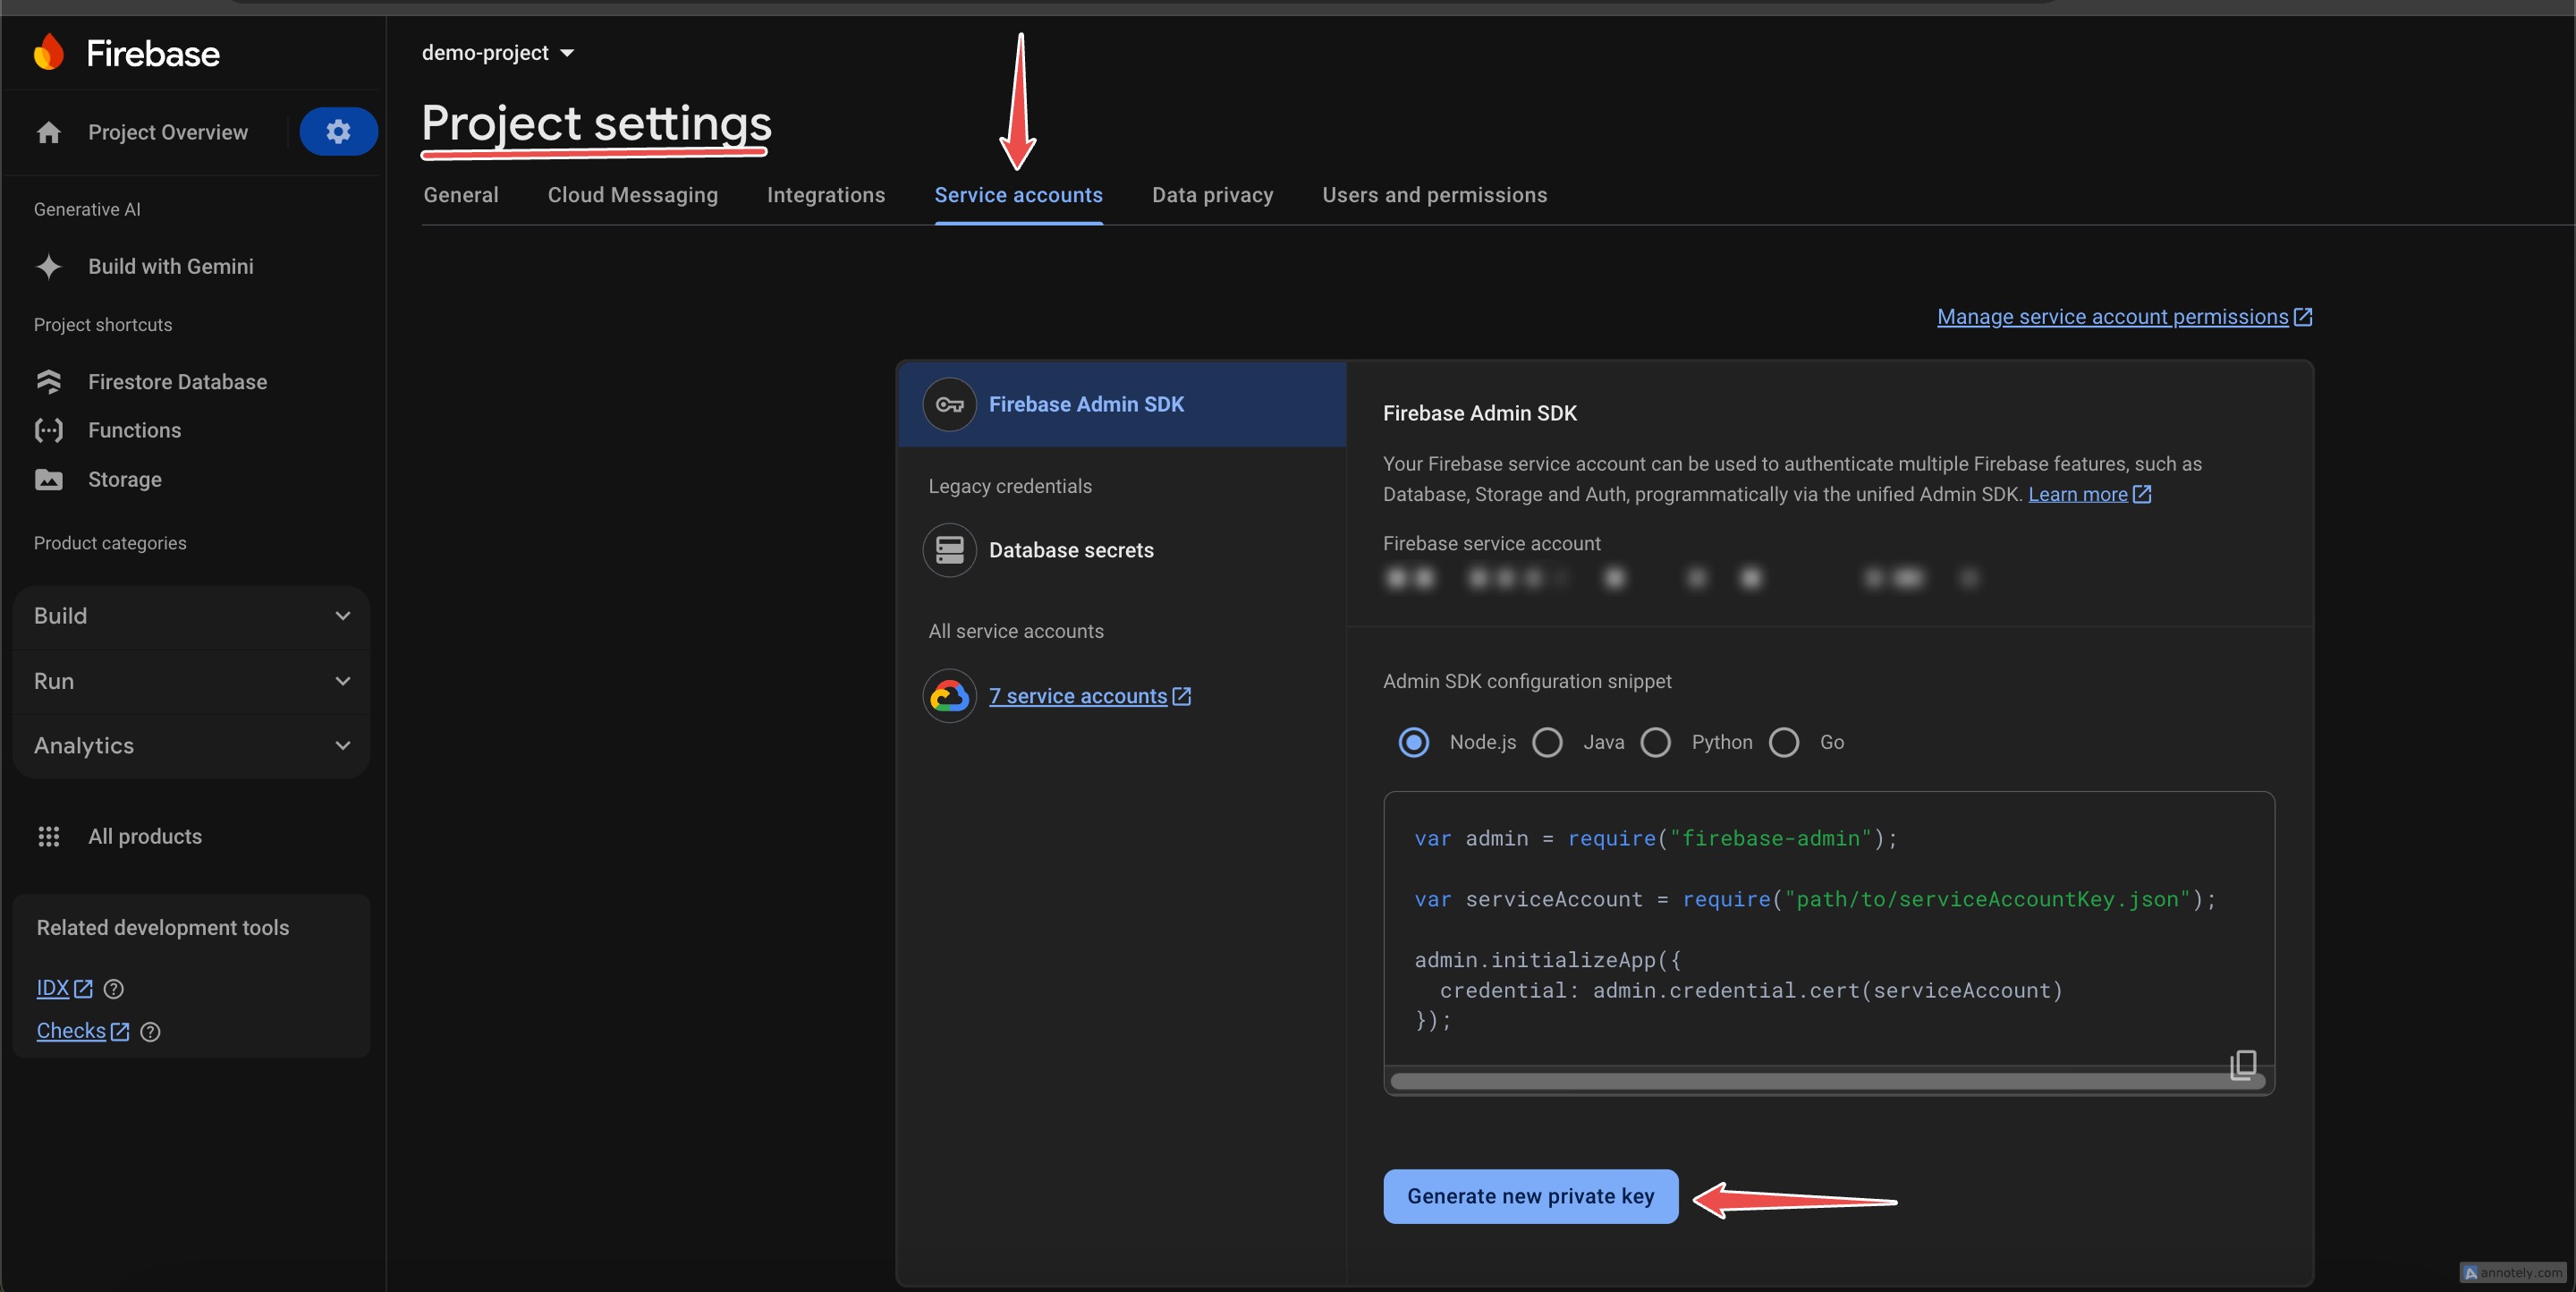
- Replace contents of the file in
db/firebaseDB/production-a5g04-firebase-adminsdk-nin6u-d632b424d4.jsonwith this JSON file you just downloaded. - Finally update the
bucketURLindb/firebaseDB/index.jswith your Firebase Storage bucket URL
Before running the project, you need to set up your Firebase configuration:
- From your firebase console add a web app to your Firebase project:
- Click on Project Settings (gear icon)
- Under "Your apps", click the web icon and register a web app.

- Copy the provided firebaseConfig object
- Replace the firebaseConfig object in
client/src/admin/firebase.jsthat looks like:
const firebaseConfig = {
  apiKey: "your-api-key",
  authDomain: "your-project-id.firebaseapp.com",
  projectId: "your-project-id",
  storageBucket: "your-project-id.appspot.com",
  messagingSenderId: "your-sender-id",
  appId: "your-app-id",
  measurementId: "your-measurement-id"
};
with yours.
3. Running the Project
To start both the server and client applications, run the below commands from the root directory:
# In the root directory
yarn start
cd client
yarn start
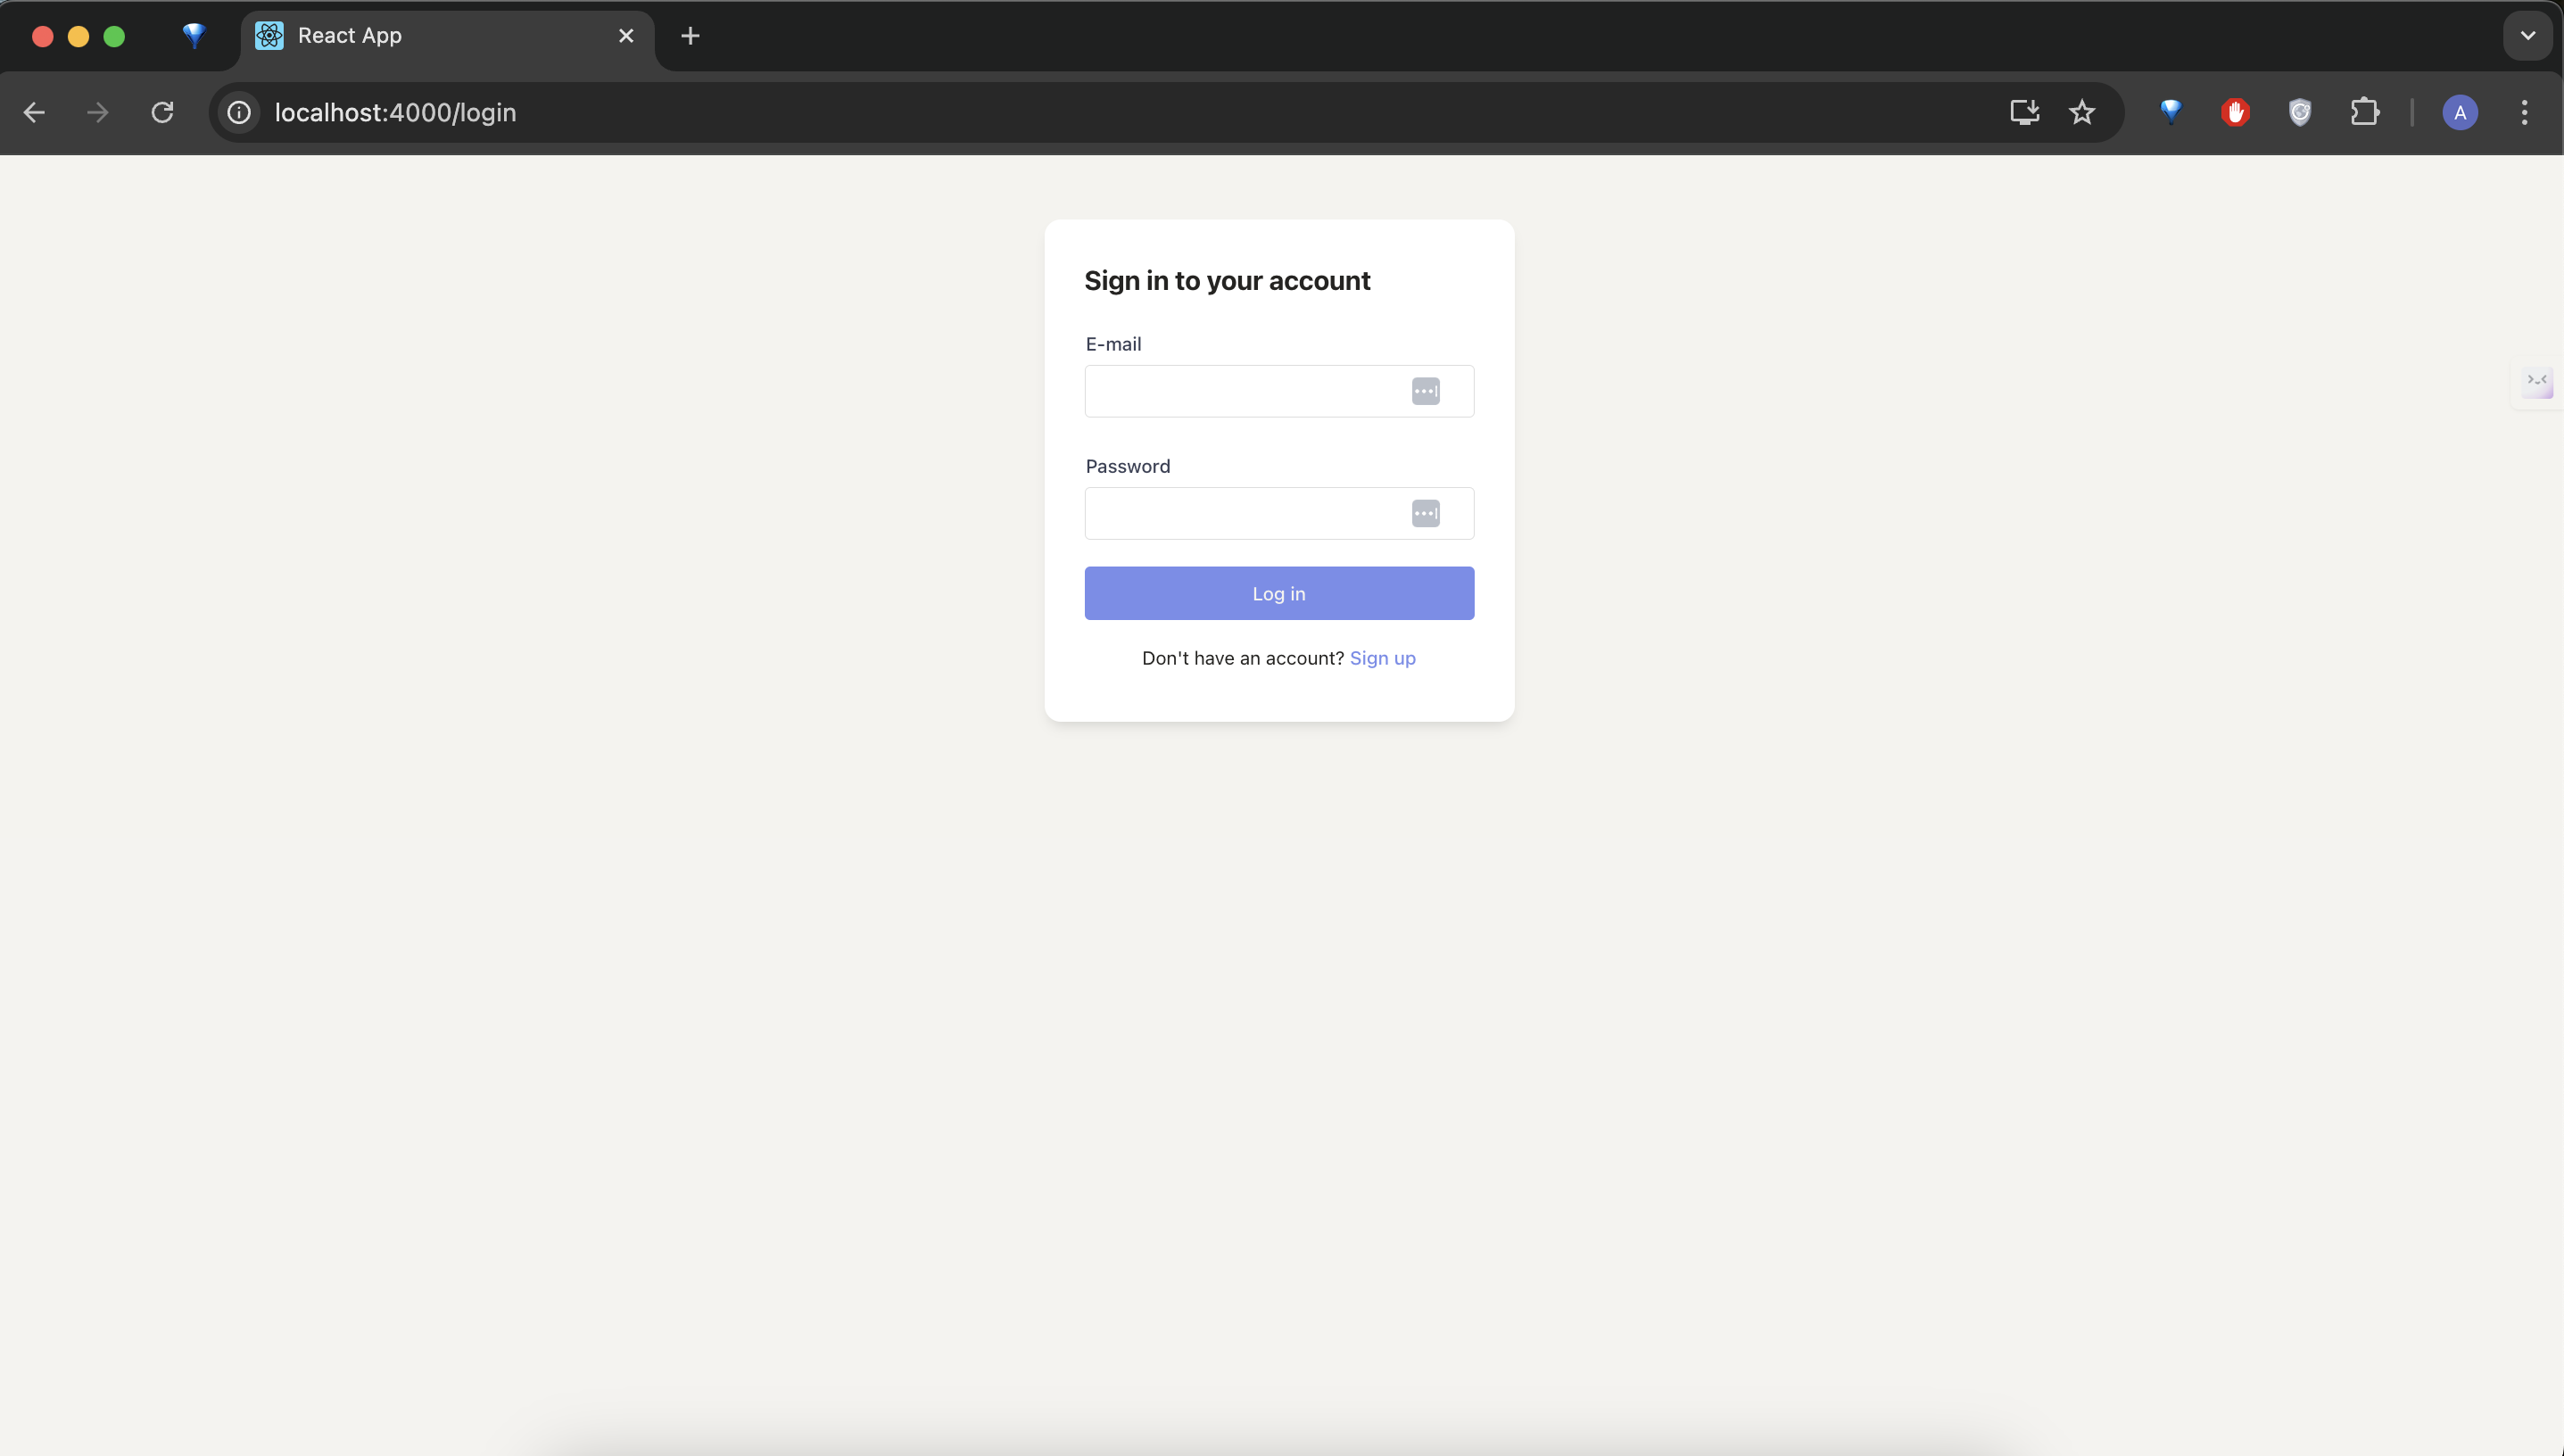
This will launch the server and open the admin panel in your default web browser, go ahead and sigup.
5. Important notes and tips about the panel
API Routes
The API routes are defined in api/apiRoutes.js. This file contains all the endpoint definitions for:
- Authentication (login, register)
- User management
- File uploads
- Notifications
- Email services
- CRUD operations for various entities (Templates, Categories, Products, Orders)
To add new routes:
- Create a new controller in the controllers directory
- Import it in apiRoute.js
- Define your routes following the existing pattern:
app.route('/api/your-endpoint')
    .get(requestAuth, (req, res) => { yourController.list(req, res, db) })
Database Interface
The project uses a flexible database interface pattern located in db/instamobileDB. The current implementation uses Firebase, but you can easily switch to another database by Creating a new class that implements all methods in FirebaseDBManager
Email Configuration
The email functionality uses SendGrid for sending emails.
Replace the SendGrid API key in your email controller with your own key:
-
Sign up for a SendGrid account
-
Generate an API key from SendGrid's dashboard
-
Replace the API key in
api/controllers/EmailController.js:
const myKey = "YOUR_SENDGRID_API_KEY"
Your admin panel is now fully set up and linked to your Firebase account. You can manage users, posts, and stories from the admin interface.